 1. Moving Icons
Hold down an app icon until all of the icons start to jiggle. Drag the icons where you would like them.
2. Removing Apps
Hold down an app icon until it starts to jiggle. You will see an “x” on the icon. Tap it. Select “Delete” to confirm. Click the central button to finish.
3. Creating Folders
Hold down an app icon until all of the icons start to jiggle. Drag the icon over a similar app that you would like in the same folder. A folder will automatically be created and given a name (which can be renamed).
4. Returning to Home
Press the central button at the bottom of your iPad to return to homescreen.
5. Viewing Running Apps
Double click the center button. A list of running apps will appear at the bottom of the screen. To close an app, hold down the icon until it starts to jiggle. Tap it and it will disappear (close). Tap the center button again.Note: If you have multitasking turned on (Settings > General > Multitasking Gestures), you can swipe up with four or five fingers to view running apps, rather than pressing the center button twice.
6. Searching Your iPad
If swipe down from the middle of the screen, a spotlight search box will appear. You can use this search box to search for content on your iPad. By default, it is set to search contacts, apps, music, podcasts, videos, audiobooks, notes, events, mail, reminders, and messages. You can, however, adjust these settings (Settings > General > Spotlight Search).Note: If you type something in search and scroll to the very bottom, you will have the option of searching the Web or Wikipedia.
7. Changing Your Search Engine
When you use Safari, the default search engine is Google. You can change your search engine to Yahoo or Bing (Settings > Safari ).
8. Changing Your Email Signature
If you don’t want to sign all of your emails with “Sent from my iPad,” you can change your signature (Settings > Mail, Contacts, Calendars > Signature).
9. Turning Off Auto-Correction
The iPad will check your spelling and suggest edits as you type. If you don’t reject the suggestion by tapping on the “x” that appears, the suggested edit will overwrite your typing. If you don’t want it to do this, you can turn off auto-correction (Settings > General > Keyboard > Auto-Correction).
10. Using the Split Keyboard
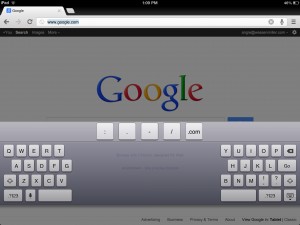
You might find it easier to type on a split keyboard. First, make sure the split keyboard is available (Settings > General > Keyboard > Split Keyboard). The split keyboard will not automatically appear once activated. You will need to place two fingers in the middle of the keyboard and drag them in opposite directions to split the keyboard.
11. Passcode Protecting Your iPad
You should passcode protect your iPad to minimize the opportunity for others to access your personal information. You can assign a simple (4 digit) passcode (Settings > General > Passcode Lock > Turn Passcode On > Simple Passcode). To assign a more advanced passcode (recommended), make sure “Turn Passcode On” is selected, but then slide “Simple Passcode” to “Off.” You will be asked to choose a new passcode.
12. Reboot the iPad
Hold down the Sleep/Wake button for several seconds. The iPad will prompt you to slide a button to power off the iPad. If the iPad is unresponsive, hold down both the Sleep/Wake button and the Home button. This will force the iPad to power down. The iPad screen will display the circle of dashes which indicates it is busy. Once the iPad is finished shutting down completely, the screen will go completely black. Now hold down the Sleep/Wake button for several seconds. When the Apple logo appears in the middle of the screen, release the Sleep/Wake button. The iPad will restart shortly after the logo appears.
13. Turn down the brightness to save battery life
A quick way to get the most out of your iPad’s battery is to turn down the brightness of the display. You can do this by going to the iPad’s settings and choosing “Brightnesss & Wallpaper” from the left-side menu. The further to the left you move the slider, the less bright the screen will be (and thus the less power it will use).
14. Contacting AppleCare
Every iPad comes with one year of hardware repair coverage through its limited warranty and up to 90 days of complimentary support. AppleCare+ for iPad extends your coverage to two years from the original purchase date of your iPad and adds up to two incidents of accidental damage coverage, each subject to a $49 service fee plus applicable tax.
If you purchased AppleCare, in the event of an incident of accidental damage, you must contact Apple Support to request service. To save time, have your device serial number ready. To find your serial number on your iPad, go to Settings>General>About.
Contact Apple Support at www.apple.com/support/contact